Press-on nails are quick and easy to apply, but they can look just as good as a salon manicure. Beginners often worry that they’ll fall off too quickly, but with some effort, you can get them to last nearly as long as professional acrylics.
A lot influences how long your nails will last, and we’ll cover it all in this guide. The best press-ons will last for up to 10 days with minimal effort, although there are options out there intentionally designed for shorter wear times.
If your goal is even longer-lasting nails, we’ll let you in on a few secrets to help your DIY nails stay put for as long as possible.
Table of Contents
Average Lifespan of Press-On Nails
The average lifespan of a press-on nail application is around a week, accounting for the different types of adhesive, different approaches to application, and your lifestyle.
Most press-on nail brands promise approximately 7 to 10 days of wear. This usually assumes good application technique and a normal lifestyle. With meticulous care, some users can get their press-on to last for up to 3 weeks. On the other hand, if you’re hard on your nails or less careful with your application, they won’t last as long.
Nails with pre-applied adhesives (sometimes called “no glue” press-ons) usually last for closer to 3 to 5 days, while press-on adhesive tabs only hold up for a day or two.
Factors Affecting Press-On Nail Lifespan
From the press-on nails you choose to your application, here are the different factors that impact how long your nails will last.
Type of Adhesive
You’ll find three main adhesive options when shopping for press-on nails: Brush-on liquid glues, adhesive tabs, and pre-applied adhesives. If your goal is longevity, brush-on glues will do the best job as they’re made of a similar material to the professional adhesives used in nail salons. Adhesive tabs are intentionally designed for those who want easy removal within a day or two.
Nail Prep
How you prep your nails will have a major impact on the longevity of your press-on nails. Skipping steps like dehydrating and buffing the surface of your nails will significantly reduce how long they last.
Application
Following proper application techniques is also key for better longevity. That includes using the right amount of glue, pressing the nail down for long enough, and allowing it to cure completely before using your hands. It can take a little bit of practice to achieve a flawless application, but don’t worry — you’ll get there soon enough!
Lifestyle
Finally, how much stress you put on the nails as part of your lifestyle may also impact longevity. Things like hand washing dishes, using your nails to open can tabs, and any other rough treatment or excessive water exposure will compromise their longevity.
Tips for Making Press-On Nails Last Longer
If your goal is an ultra-long-lasting manicure, here are our key tips when applying your DIY press-on nails.
Buff Well
Buffing is an essential step if you want your press-on nails to last longer. Smooth, shiny natural nails might look pretty, but they won’t serve as a great surface for adhesion. On the other hand, if they’re a little rough, the nail glue will be able to sink into the grooves and create a much stronger bond between your natural nails and the press-ons.
Your goal when buffing your nails is to create a slightly uneven surface without any shine — once you reach that point, stop buffing. Use a regular nail buffer rather than an electric file, as over-buffing can thin out your natural nail and lead to damage.
Use a Prep Pad
Using an alcohol pad on your nails is also a must for longer-lasting DIY nails. Any moisture or oil (including your body’s natural sebum) on the surface of your nail can compromise the glue bond, making it easier for your nails to pop off. Alcohol is incredibly effective at removing those trace oils from your nails and hands. After buffing, simply wipe your nails with an alcohol pad and allow them to dry.
Choose the Right Size
Your press-on nails should come in a variety of size options to account for the different sizes of your natural nails. Select your sizes carefully by measuring the press-on against the natural nail. The press-on should cover your nail bed completely but without extending over your cuticles or your skin. Choosing the wrong size means the nail won’t make full contact with your nail bed, making it more likely to lift or pop off.
Apply Glue to Nails and Press-Ons
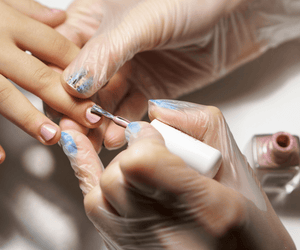
It may take a bit of practice, but using the right amount of glue is key for achieving optimal adhesion. Make sure to swipe a small amount over your natural nails and add a drop to your press-ons as well. This will create two sticky layers that are ready to bond to each other!
If you use too much glue, it won’t dry down fast enough, and it could also get pushed onto your skin. If you don’t use enough glue, there won’t be a strong enough bond. It might take you a bit of practice to find the ideal amount based on the size of your nails.
Press Down Firmly
Once you’ve positioned the DIY nail over your natural nail, press it down for at least 30 seconds, and make sure the positioning is perfect.
Let Them Cure
One of the most overlooked ways to get your press-on nails to last is giving the glue enough time to dry down completely. You should avoid washing your hands for at least 2-3 hours after application. For best results, we recommend doing your nails before you go to bed, so you can let them cure for the entire night.
Avoid Water Exposure
The better you are at avoiding water exposure, the longer your nails will last. Avoid submerging your hands in water for long periods of time, and wear gloves when washing dishes, gardening, or similar activities.
Signs That It’s Time to Remove Press-On Nails
Long-Wearing Press-Ons From Lilac St.
The Lilac St. Press-On Nail Kits feature everything you need for long-lasting manicures. Our unique, artful designs were developed by nail artist Tea L. to suit every taste and style. You’ll enjoy optimal longevity thanks to their flexible, durable construction and a powerful adhesive that’s gentle on your nails. For best results, make sure to apply them following the suggestions we’ve outlined in this post!


