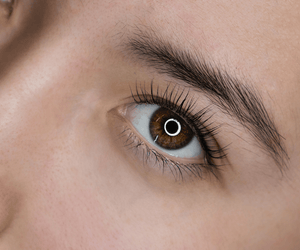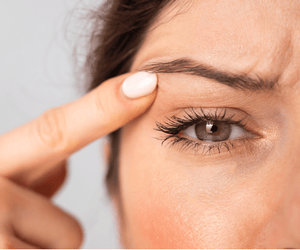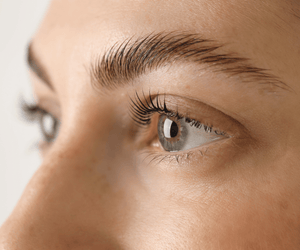
When you think of ways to enhance the lash line, mascara, false lashes, or lash extensions are probably the first things that come to mind. But now that you think about it, eyelash tinting could be what you truly need. Instead of temporarily coating the lashes, an eyelash tint dyes them for long-lasting definition. If you want to learn how to tint your eyelashes, we’ll explain the entire process here.
Table of Contents
- WHAT IS TINTING?
- AT-HOME VS. PROFESSIONAL TINTING
- PREPARING FOR EYELASH TINTING
- STEP-BY-STEP GUIDE TO TINTING EYELASHES AT HOM
- AFTERCARE AND MAINTENANCE TIPS
- DON’T TINT YOUR LASHES IF…
WHAT IS TINTING?
Eyelash tinting is a treatment that dyes the lashes. Lash tinting formulas work by opening the cuticles of the lashes and depositing dark brown or black color, just like regular permanent hair dyes. However, the ratio of ingredients in them is adjusted to ensure that they’re safe for the eyes.
Most eyelash tint formulas are similar to semi-permanent or permanent hair dyes, with a color and a developer. The developer is responsible for “lifting” the cuticles, often made with hydrogen peroxide.
AT-HOME VS. PROFESSIONAL TINTING
In the same way that many people choose to dye their hair at home, tinting your lashes at home probably sounds appealing. It’s a great way to achieve darker, more defined lashes without paying much money or leaving the comfort of your home.
If you generally take the DIY approach with most beauty methods (hello, DIY lash extensions), consider doing your lash tint at home instead of paying a professional. Most at-home kits retail for $15-$25 and contain enough product to achieve at least 12 applications. By comparison, a single professional application can cost upwards of $40.
Keep in mind that tinting the lashes is tricky. The process involves applying a slippery, potentially irritating material very close to the eyes. You’ll need to keep one eye closed as you use the tint to the lashes to avoid any lash tint in your eyes.
Applying a lash tint with only one eye open can be difficult, whereas, in a salon setting, you can keep both eyes closed while the technician applies the tint to both eyes.
PREPARING FOR EYELASH TINTING
There’s a little bit of prep you should know about before you tint your lashes:
- Choose a reputable eyelash tint from a trusted brand. Be careful when shopping online, and make sure to choose a product that was created specifically for the lashes. There is a risk that lash tints from disreputable sellers could contain coal tar dye.
- Do a patch test 24-48 hours before tinting your lashes, by applying a small amount of the tint to your skin. You should avoid tinting your lashes if you experience any signs of an allergic reaction, such as redness, stinging, hives, or scaling. This is especially important if you’ve never used hair dye before.
- Confirm that your eyes look and feel healthy on the day of your appointment. Don’t tint your lashes if you have any signs of allergy, irritation, or infection near the eyes.
- Clean your eyes with a gentle, oil-free cleanser such as our Lilac Lash Shampoo, micellar water, or a mild face wash. Rinse your eyes thoroughly with cool water. Make sure there is absolutely no makeup residue on your eyes.
STEP-BY-STEP GUIDE TO TINTING EYELASHES AT HOME
And finally, here’s how to tint eyelashes, step-by-step and all by yourself!
- Wash your hands thoroughly. Consider wearing disposable gloves for the tinting process.
- Make sure that your eyes are clean and makeup-free. You can use any gentle, oil-free cleanser that is safe for the eye area.
- Depending on the formula, you may need to prep your eyelash tint by combining the color and the developer in a small container, using a small makeup brush or a disposable applicator. Allow the mixture time to develop based on the product instructions (usually 2-3 minutes).
- Using your fingers or a cotton bud, apply petroleum jelly as close to the lash line as you can, both on top and bottom. It will act as a barrier cream, preventing the tint from staining your skin.
- Your eyelash tinting kit may come with pre-made pads, which you can apply above and below your lash line to protect the skin further. You can also cut cotton pads into half-moon shapes and use those instead.
- Carefully, apply the color mixture to your lashes, trying to get as close to the lashline without actually touching the skin. Use a rice grain-sized amount of tint, since you may stain your eyelid if you use too much.
- In the case of 2-step kits, you may need to apply the color (or “step 1”) to the lashes first, let it dry, and then use the developer (“step 2”) afterward.
- Keep your eyes closed for the entire duration of the application. Let the tinting formula sit on your lashes for the time written on the package (normally 7-10 minutes).
- Dampen a cotton pad with water and use it to wipe the tint off your eyelashes. Wipe in a downward motion to avoid getting any tint in your eyes. Keep wiping until there is no more tint residue left on your lashes.
- Finally, you can remove the pads on your eyes and wipe away the petroleum jelly.
- With one set of lashes done, repeat the process on the other eye.
AFTERCARE AND MAINTENANCE TIPS
After you tint your eyelashes, there’s very minimal aftercare and maintenance. Here’s everything you’ll need to do:
- Continue to use gentle cleansers around the eye area, to maintain the integrity of your lashes and to avoid stripping the tint.
- Keep your lashes, and the rest of the eye area moisturized.
- You can use a lash serum, if you wish, to fortify your lashes and boost their growth.
- Even though many lash tints are permanent, it’s natural to lose up to 5 lashes per day as part of the natural eyelash growth cycle. You can expect to require touch-ups every 4 to 6 weeks to account for your tinted lashes shedding naturally.
DON’T TINT YOUR LASHES IF…
- You have any pre-existing allergies to hair dye?
- If there are no reputable or trustworthy lash tint kits available for purchase.
- You are experiencing skin or eye issues, such as styes, infection, allergic reaction, or irritation.
- If you have issues keeping one eye closed or maintaining steadiness in your hands, avoid tinting your lashes yourself. Instead, consider visiting a salon or having a friend help.
- Your lashes are already naturally dark. Lash tinting can only do so much for those with naturally dark lashes. To see a visible difference, you might need a product that increases lash length or volume, such as mascara or lash extensions.
BOTTOM LINE
Learning how to tint your lashes isn’t too complicated, but it does require a bit of finesse! Make sure you’re a safe candidate for lash tinting with a patch test, and have a friend help you out if you’re a little nervous about getting any product in your eyes.
If you want the best of all worlds, enhance your tinted lashes with a DIY lash extensions kit! Designed for a simple, easy, and safe self-application, DIY extensions can amp up your lashes significantly, and they stay put for days.


